[AI-generated illustrative image] Image for illustration purposes
This post contains affiliate links. If you shop through one, I may earn a small commission at no extra cost to you.
Disclaimer: The information on this blog is for educational purposes only and does not substitute for professional medical advice. Always consult a physician before starting a new exercise program or using home gym equipment.
This guide keeps it simple. You will learn what to look for in resistance bands for seniors, see one light, longer band that was made with this audience in mind, and get a short seated routine you can try at home with nothing but a sturdy chair. Let’s take a look:
Why Resistance Bands Suit Home Exercise
Of all the at home fitness products on the market today, resistance bands provide a tool that can provide an efficient workout right from home. They are light, quiet and inexpensive, and a single band folds into a drawer, so there is no equipment to set up and no floor space to give up.
In addition, bands also let you control the effort. The farther you stretch these bands, the more tension you feel, so you can start gently and work up as a move becomes comfortable. Because you can do many band exercises while seated, they pair well with the chair-based routines some prefer at home.
What to Look For in Resistance Bands for Seniors

[AI-generated illustrative image] Image for illustration purposes
Before you buy, check these five things. They matter more than color or brand.
Length
A longer band is easier to handle. With a short loop, you may have to hold your hands very close together or hunch forward to get tension. A band of about four feet gives you room to hold each end comfortably, wrap it around your feet while seated, and adjust how much slack you start with.
Resistance Level
Start lighter than you think you need. A light band lets you focus on slow, smooth movement and good posture instead of fighting the tension. If a move feels easy after a few weeks, you can add repetitions or move up to a stronger band later. Starting too heavy is the most common reason people give up on bands.
Latex-Free Material
Some people are sensitive to latex. A latex-free band removes that worry, and it is a useful feature to look for if you are not sure.
A Guide or Clear Instructions
A printed guide helps if you are new to band work. Look for step-by-step pictures you can follow, ideally with seated and standing options, so you are not guessing about form.
Comfort and Storage
The band should feel smooth in your hands and should not pinch or roll. Check that it is easy to store near your chair so it is within reach when you want to use it. A tool you can grab in ten seconds gets used more often than one tucked away in a closet.
My Pick: A Light, Long Band Made for Seniors
The band I am featuring is a resistance band made specifically for older adults. It matches the checklist above in several ways:
- Length: it measures about four feet, which gives you plenty of room for seated and standing moves.
- Resistance: it is listed as light resistance, a sensible starting point for beginners.
- Material: it is latex-free.
- Guide included: it comes with a full-color poster that shows 10 exercises.
Who it suits: beginners who want a gentle way to start, people doing chair-based routines, and anyone who wants a simple, low-cost band to keep next to a favorite chair.
Where it falls short: it is a single light band, so it will not challenge someone who already trains with heavier resistance. If you find the moves easy after a few weeks, you may want to add a medium band or a set with several levels. The listing also has only a small number of reviews so far, so read the current ratings and details before you decide. Product details can change, so check the listing for the most up-to-date information.
Click HERE to View This Resistance Band
A Simple Seated Routine: 5 Resistance Band Exercises for Seniors
Here is a short routine you can try with a light band. Sit toward the front of a sturdy chair without wheels, keep your feet flat on the floor and your back tall, and move slowly. Breathe steadily throughout, and never hold your breath.
How to start: do each move for 8 to 10 slow repetitions. Begin with one round of all five moves. If that feels comfortable, build up to two rounds over a few weeks. Rest as long as you need between moves.
1. Seated Row
[AI-generated illustrative image] Image for illustration purposes
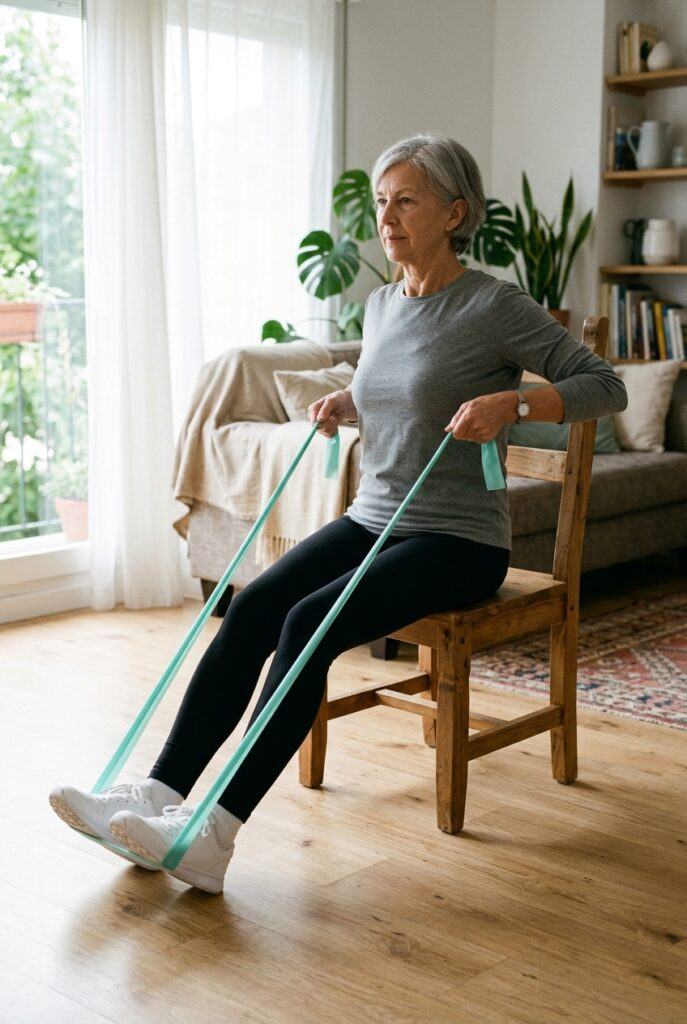
Sit tall with your legs extended in front of you and your heels on the floor. Loop the band around the soles of your feet, holding one end in each hand. Pull your elbows straight back, gently squeezing your shoulder blades together, then slowly return. This move works the muscles of the upper back.
2. Seated Bicep Curl
[AI-generated illustrative image] Image for illustration purposes
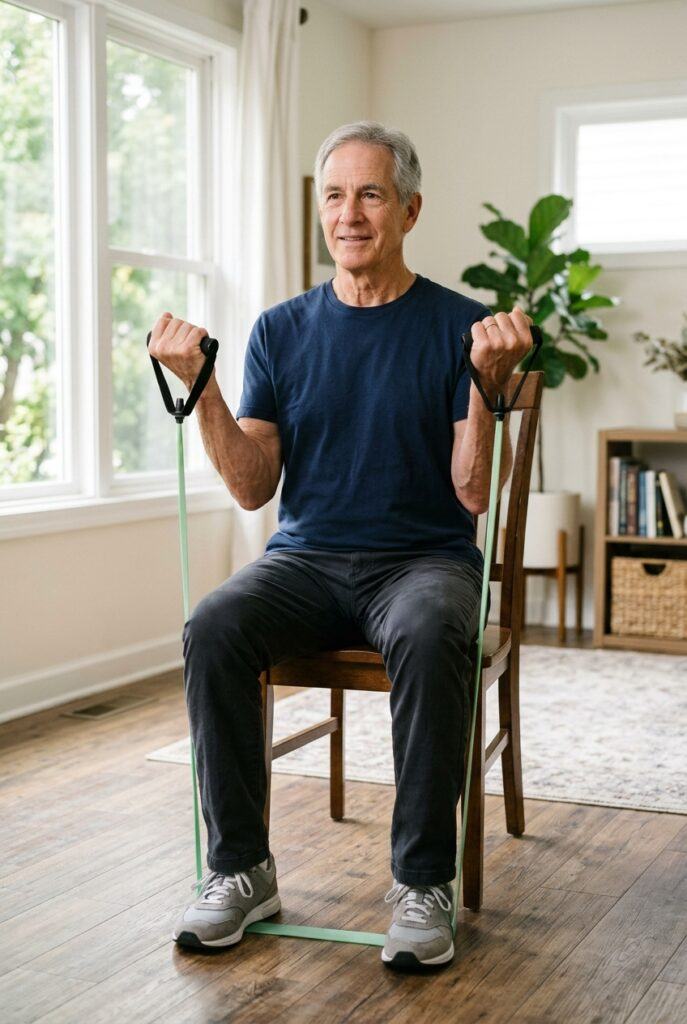
Place the middle of the band under both feet, flat on the floor. Hold the ends with your palms facing up and your elbows at your sides. Curl your hands toward your shoulders, then lower with control. Keep your elbows close to your body.
3. Chest Pull-Apart
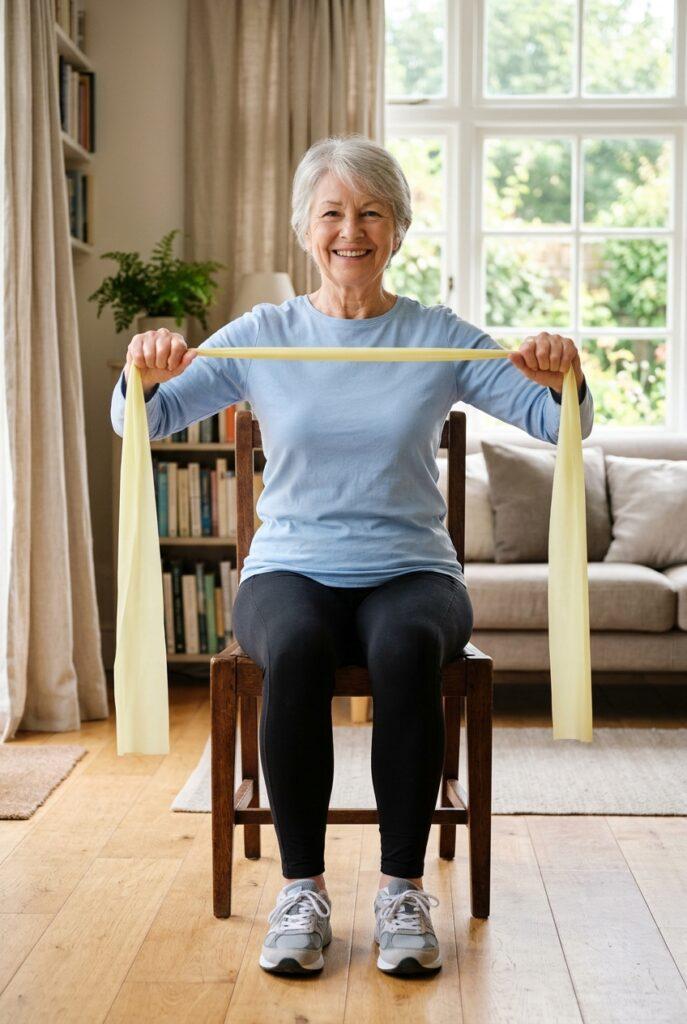
Hold the band in front of you at chest height with your arms straight and about shoulder-width apart. Slowly pull your hands outward, opening your arms to the sides, then bring them back together. Keep your shoulders relaxed and away from your ears.
4. Overhead Press
[AI-generated illustrative image] Image for illustration purposes
Place the band under your feet and hold the ends at shoulder height with your elbows bent. Press your hands upward until your arms are comfortably extended, then lower slowly. If lifting overhead feels uncomfortable, stop at a height that feels good, such as the top of your head.
5. Seated Leg Press
Sit tall and loop the band around the sole of one foot, holding both ends in your hands with your elbows bent. Slowly extend that leg forward against the band, then bend it back in with control. Complete your repetitions on one leg, then switch to the other.
Safety Tips Before You Begin
- Check your band every time. Look for nicks, thin spots or tears before each session, and replace the band if you see any.
- Use a stable chair. Choose a chair without wheels that will not slide, and place it on a non-slip surface.
- Move slowly. Smooth, controlled movement matters more than how far you stretch the band.
- Stop if something hurts. A mild muscle effort is expected, but sharp pain, dizziness or shortness of breath are signs to stop and check with your doctor.
- Start light. You can always add repetitions or a stronger band later.
Frequently Asked Questions
What are the best resistance band exercises for seniors?
Seated moves are a good place to start, because the chair gives you support. Rows, bicep curls, chest pull-aparts, overhead presses and leg presses, like the ones above, cover the major muscle groups with very little equipment.
How often can I use a resistance band?
Many people begin with two or three short sessions a week, with a rest day in between. The right amount depends on your comfort and any guidance from your doctor.
Is a light band enough?
For most beginners, yes. A light band lets you learn the movements and build the habit. If the exercises feel easy for several weeks, you can add repetitions or add a stronger band.
Do I need a chair?
Not necessarily, but a chair is helpful. Many of these moves can be done standing, and the printed guide included with the band shows options. If balance is a concern, stay seated.
Final Thoughts
In this article, we have taken a look at a resistance band that is appropriate for seniors. In addition, we have looked at a number of exercises that can be performed right at home. The best resistance band for you is one you will actually use. Look for a longer length, light resistance, latex-free material and clear instructions, then start with a few slow, comfortable repetitions. A light band, a sturdy chair and ten minutes are enough to begin building a simple home routine. I hope this guide makes the first step easier, and I wish you the best on your fitness journey.